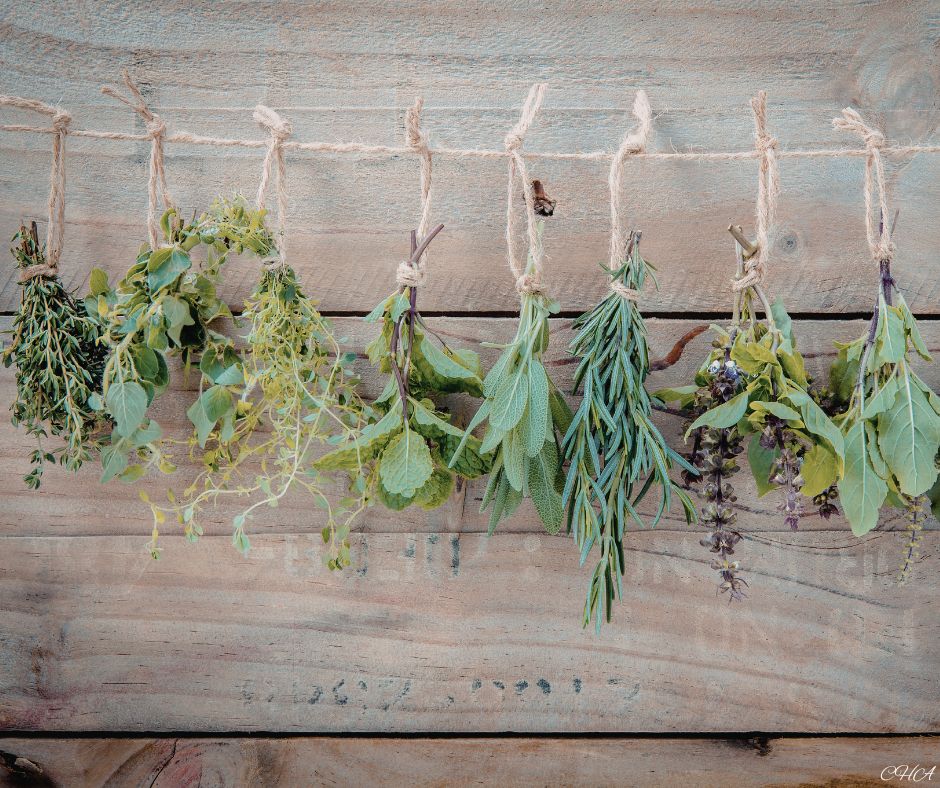
Imagine this: you step into your backyard, balcony, or sunny windowsill, snip a handful of fresh lemon balm and rosemary, and turn it into a potent batch of herbal tea blends that actually deliver calm, glowing skin, better sleep, and immune support — even months later. No faded flavor, no lost power, just vibrant wellness straight from your beginner herb garden.
With climate-resilient gardening on the rise and everyone building their zero-waste apothecary, knowing exactly how to harvest, dry, and store your homegrown herbs is the game-changer. Do it right and you lock in those essential oils and medicinal compounds. Do it wrong and you watch potency evaporate faster than morning dew.
This guide walks you through every step with traditional herbal wisdom plus modern science-backed tips. You’ll learn the perfect harvest timing, foolproof drying methods (air-dry or dehydrator), smart storage hacks, and simple 5–15 minute recipes that turn your dried herbs into daily rituals for energy, calm, and glowing skin.
Your quick win today? Head out tomorrow morning after the dew dries and harvest just one bunch using the tips below. You’ll taste the difference immediately — and keep that power all year long!

Why Proper Harvesting, Drying, and Storing Preserves Maximum Potency
Your homegrown herbs are packed with volatile oils, antioxidants, and bioactive compounds that deliver real benefits like stress relief and immune support. But those goodies are fragile. Heat, light, moisture, and oxygen steal them fast.
Herbalists have known this for centuries, and modern studies confirm it: improper handling can slash essential oil content by 30–50% or more. Get the timing, drying, and storage right and you preserve up to 90% of the potency — turning your small-space garden into a true zero-waste apothecary full of science-backed adaptogens and DIY natural remedies.
The best part? These steps are simple, sustainable, and bioregional. You honor the plants, cut waste, and enjoy fresher, stronger herbs than anything store-bought. Ready to lock in that power?

When to Harvest: Morning Magic for Peak Essential Oils
The single biggest secret? Harvest in the early morning, right after dew dries but before the sun gets hot. That’s when essential oils are most concentrated in the leaves and flowers.
Studies and herbal tradition agree: by midday the sun volatilizes those precious compounds, leaving you with weaker flavor and medicine. Aim for a clear, dry morning — perfect across most regions from spring through early fall.
Quick rule by plant part:
- Leaves (lemon balm, rosemary, thyme): Snip just before flowers open for maximum oils.
- Flowers (chamomile, lavender, calendula): Harvest when buds show color but before they fully bloom.
- Roots (echinacea, ashwagandha): Dig in fall after tops die back or early spring.
Never take more than one-third of the plant so it keeps producing. This ethical approach keeps your beginner herb garden thriving season after season.

Step-by-Step Harvesting Techniques for Every Herb
Grab clean, sharp scissors or pruners — no crushing the leaves!
- Inspect and choose healthy, vibrant growth away from roads or sprayed areas.
- Cut stems cleanly above a leaf node to encourage bushier regrowth.
- Gently shake off any bugs or dirt — no need to wash unless really dirty (excess water slows drying).
- Work quickly — process the harvest same day to lock in potency.
For your climate-resilient garden, harvest more frequently during heat waves when oils concentrate faster. Label every bunch with date and herb right away — future you will thank you!

Choosing the Best Drying Method to Protect Volatile Oils
Different herbs love different methods, but the goal is always the same: remove moisture fast without high heat or light that destroys essential oils.
Air drying wins for most home growers because it’s gentle and zero-waste. Dehydrators work great in humid areas. Avoid direct sun or high oven heat — studies show they bleach color and zap potency.
Best matches:
- Delicate leaves and flowers (mint, basil, chamomile): Air dry or low-temp dehydrator.
- Woody stems (rosemary, thyme, lavender): Air dry hanging.
- Roots: Slice thin and dehydrate at 95–110°F.
This keeps your herbs vibrant for herbal tea blends and DIY natural remedies all year.

Easy Air-Drying and Dehydrator Techniques That Work Every Time
Air-drying (the traditional favorite):
- Bunch stems loosely (small bunches prevent mold).
- Tie with twine or rubber bands.
- Hang upside down in a dark, warm, airy spot (closet, attic, or pantry with good airflow).
- Check after 1–2 weeks — leaves should crumble easily.
Dehydrator method (faster for humid summers):
- Lay leaves or flowers in single layer on trays.
- Set to 95–115°F (lower for delicate herbs).
- Dry 1–4 hours, checking often.
Both methods preserve more oils than oven drying, according to research. Your herbs will smell amazing and keep their beautiful color.
Storing Dried Herbs the Right Way for Long-Lasting Potency
Once completely dry and brittle, strip leaves from stems (keep whole — crushing releases oils).
Golden storage rules:
- Use airtight glass jars or tins (plastic can leach flavors).
- Label with herb and date.
- Store in a cool, dark cabinet away from stove, windows, or heat.
- Whole leaves stay potent longer than ground herbs.
Properly stored, leaves and flowers last 1–2 years; roots up to 3 years. This zero-waste apothecary habit saves money and keeps your homegrown herbs fresher than anything you can buy.

Common Mistakes That Steal Your Herbs’ Power (and Easy Fixes)
- Harvesting in the heat of day → Switch to morning only.
- Overcrowding drying bunches → Use smaller bundles.
- Storing in clear jars on the counter → Move to dark cabinet.
- Washing everything → Only rinse if dirty, then dry thoroughly.
- Grinding too soon → Keep whole until you use them.
Fix these and your potency stays sky-high — no more disappointing weak teas!
4 Simple Recipes Using Your Perfectly Dried Herbs
Morning Energy Herbal Tea Blend (5 minutes)
Ingredients:
- 1 tsp dried rosemary
- 1 tsp dried thyme
- ½ tsp dried lemon balm
- 1 cup hot water
Instructions:
Steep 7 minutes, strain, and sip. Feel the focus and steady energy kick in!
Glowing Skin Calendula & Lavender Bath Soak (8 minutes)
Ingredients:
- ¼ cup dried calendula petals
- 2 tbsp dried lavender buds
- 1 cup Epsom salts
Instructions:
Mix and add to warm bath. Soak 20 minutes for soft, calm skin.
Immune-Support Thyme & Sage Honey (10 minutes)
Ingredients:
- ½ cup dried thyme and sage
- 1 cup raw honey
Instructions:
Bruise herbs, pack in jar, cover with honey. Infuse 1–2 weeks. Stir into warm water for seasonal defense.
Calm Bedtime Adaptogen Tea (6 minutes)
Ingredients:
- 1 tsp dried chamomile
- ½ tsp dried holy basil
- ½ tsp dried lavender
Instructions:
Steep in hot water 7–10 minutes. Sip slowly and unwind.
Pro Tips & Quick Wins for Potent Homegrown Herbs
- Harvest in the morning, dry in the dark, store in glass — your herbs will stay as powerful as the day you picked them!
- Test dryness by crumbling a leaf — if it’s still bendy, keep drying.
- Save seeds from your strongest plants for true bioregional herbalism.
- Rotate your stock — use oldest jars first.
- Track your results in a simple journal: note harvest date, drying method, and how the tea tastes months later. You’ll see the transformation!
“A few careful steps turn your garden harvest into year-round wellness — potent, sustainable, and completely yours.”
You’ve Got the Secrets — Now Harvest, Dry, and Store Like a Pro!
You now know exactly how to harvest, dry, and store your homegrown herbs without losing a drop of potency. From morning timing and gentle drying to smart storage and delicious recipes, every step protects those essential oils so you enjoy calm, glowing skin, better sleep, immune support, and steady energy all year long.
Your beginner herb garden or container setup is about to become a true zero-waste apothecary full of climate-resilient, science-backed magic.
Grab those scissors tomorrow morning, follow the steps, and taste the difference.
Drop a comment below: Which herb are you harvesting first, or what’s your favorite way to use dried herbs? Share this guide with a friend who grows their own, and tag your dried-herb jars or tea rituals — I’d love to cheer you on!
For weekly harvesting tips, seasonal zero-waste recipes, and a free “Herb Harvest & Storage Cheat Sheet,” hit subscribe. Your potent, glowing wellness journey starts with that first perfect harvest.
You’ve totally got this— go preserve something beautiful!



Leave a Reply